Translations: "Dutch" |
Use Swagger Json for Github Copilot
updated on 2025-04-25
Hey there! I've got an awesome productivity hack to share that's been saving me tons of time when working with APIs. Let me show you how to leverage Swagger JSON documentation with VS Code Copilot to write API integration code in minutes instead of hours. When working with Large Language Models (LLMs), precision is everything - the more specific and detailed your input, the better and more accurate your results will be.
In this short note we make use of the structured data Swagger provides us and use this information in VS code so copilot can generate functions base on this data to work:
1. Get Your Swagger JSON.
What is swagger?
Swagger lets your API speak a universal language that machines can understand, which is pretty awesome! When your API shares its structure through a YAML or JSON file following the OpenAPI Specification, we can automatically create beautiful API documentation, generate code libraries, and even set up testing.
Download json
You can download or copy the content of your api specification directly using a directly of go to https://{fqdn}/swagger and click the download link.
Swagger download link location
Depending on your configuration, store or create a json in your project.
2. Load it Into VS Code
Load (external) content
Load with #fetch
It's now possible to load the swagger.json file directly in your project using the #fetch command. This saves you the hassle of downloading and storing the file manually. Just use the command #fetch followed by the URL of your Swagger JSON file.
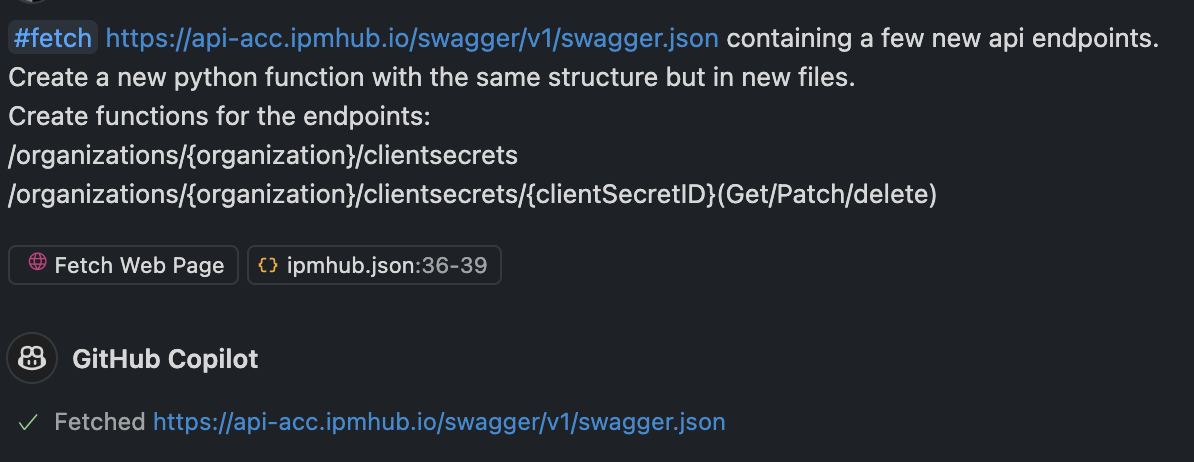
Swagger download link location
Now we have the specifications of our API ready with our project we can start using this within our project.
In this example I already have a Python class that handles logging, authentication, the CRUD actions and the handling the asynchronous / synchronous of the request in Python. And we only need to add for extra endpoints.
Load data in Github Copilot
To make sure that GitHub Copilot has all the information about the API we need to load the file in the current chat as context.
For this use the #file variable to load the swagger.json.
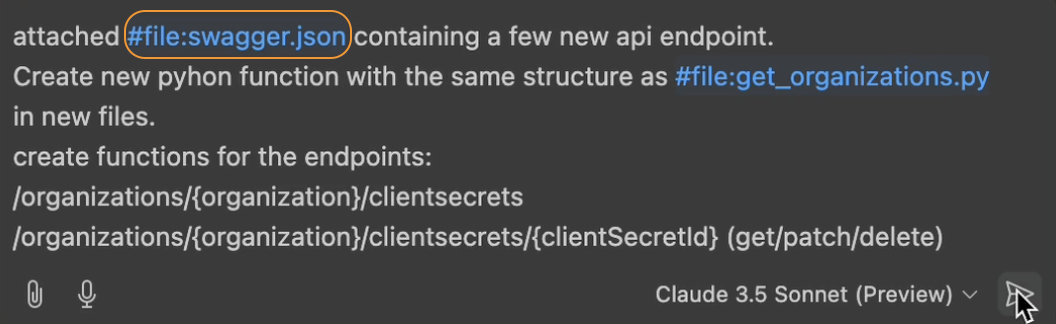
Use the #file variable to load the swagger file.
Load additional context of you application
Loading the Swagger JSON is only half the story - you also need to show Copilot how you want your code structured. In my case, I already had some existing API functions that followed my preferred coding style and patterns.
To help Copilot understand this pattern, I loaded an example file (get_organizations.py) that contained functions written in my desired style. Just like with the Swagger file, use the #file variable to add this to Copilot's context:#file:get_organizations.py \
This step is crucial because it helps Copilot:
- Match your existing code style
- Use the same error handling patterns
- Follow your project's function naming conventions
- Maintain consistency in your codebase
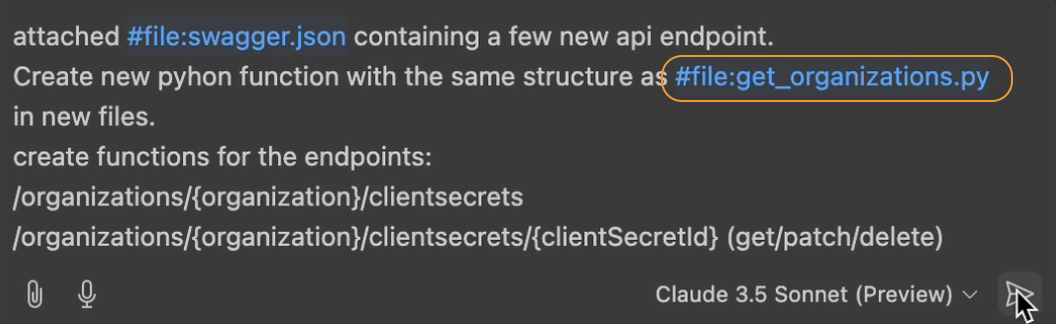
Use the #file variable to load the an example file.
The Prompt
Now the prompt, well this is the not really that excited I just ask CoPilot what I want to see, but it important to be exact as possible.
1Attached `#file:swagger.json` containing a few new api endpoints.
2Create a new Python function with the same structure as `#file:get_organizations.py` in new files.
3Create function for the endpoints:
4/organizations/{organizations}/clientsecrets
5/organizations/{organizations}/clientsecrets/{clientSecretId} (get/patch/delete)
Lets breakdown the prompt:
Attached #file:swagger.json containing a few new api endpoints.
Straightforward, point Copilot in the right direction.Create a new Python function with the same structure as #file:get_organizations.py in new files.
Also quite straightforward, but here I tell CoPilot how the end results must look like, and that I want to have it in new files.
If you do not mention the "new file instruction" it will probably append the new functions inget_organization.pyCreate function for the endpoints: {endpoint name}
Because theswagger.jsonhas far more endpoints which I already enclosed in my project, this is were I scope the prompt.(get/patch/delete)
Here I made sure that Copilot understand (just to be sure) that he must create function for all the CRUD operations.
Be as precise as possible
I have to be honest with you, in the Conclusion section below I tell you that it took me only two minutes. That was simply not true, it was three minutes. Why? I forgot to tell Copilot to create a asynchronous functions as well, ending up with only synchronous functions. And this is why you have to be as precise as possible and always check the results because the source (get_organization.py) contains both asynchronous synchronous functions.
Execution
The last thing before you can lean back in you chair is the execution. In this scenario you have two different approaches.
Copilot chat
This will generate the function in the chat window, and when don't you need to add the code to your project.Edit with Copilot
This will make the changes for you directly in your project, in this case creating a new file
The last option you can set this the model that you will use, I find my self using Claude 3.5 Sonnent the most, only switching when it becomes to slow.
In the screenshare video below you see that I use Edit with Copilot in combination with Claude 3.5 Sonnent.
Blog continues below the video
3. Conclusion and TLDR
This is why I think this is really exciting: What used to take me around 30 minutes of reading documentation, writing boilerplate code (alright copy / pasting (and making small errors)), and testing, now takes less than 2 minutes. You're essentially turning Copilot into an API expert that knows exactly what you need.\
Why this works so well?
The key here is that Swagger JSON provides a complete, structured description of your API that Copilot can understand perfectly. It's like giving Copilot a detailed map of your API - no more guessing about endpoints, parameters, or response formats. Although Swagger handles a lot, the API developers have to do their part in creating good documentation, but to be honest, this is something Copilot can help you with as well. Remember, the better documented your Swagger file is, the better results you'll get. It's worth spending a little extra time making sure your API documentation is top-notch - it'll pay off in spades when you're developing!
TLDR
Step 1: Get Your Swagger JSON
- Go to your API's Swagger UI (
/swagger) - Download or copy the JSON specification
- Store it in your project folder
- Go to your API's Swagger UI (
Step 2: Set Up VS Code
- Open your project in VS Code
- Load the swagger.json file
- Add any example files for context
Step 3: Use Github Copilot
- Use
#filevariable to load swagger.json as context - Load example files to show desired code structure
- Write a precise prompt describing what you need
- Choose either Copilot chat or Edit with Copilot
- Select your preferred model (e.g., Claude 3.5 Sonnet)
- Use
Pro Tip: Be as specific as possible in your prompts - mention if you want async functions, new files, or specific CRUD operations. The more precise you are, the better the results!
That's it! You've just turned a 30-minute task into a 2-minute job. Happy coding! 🚀